A new-to-me cast on that is perfect for my socks and mitten knitting. What a wonderful tutorial for a fantastic ribbing!!
Sunday, March 22, 2015
Thursday, March 5, 2015
Blue Ribbon Canning by Linda J. Amendt

Award-Winning Recipes
Author: Linda J. Amendt
Publisher: Taunton Press
Pub Date: Apr 28 2015
ISBN: 9781627107693
Paperback: 272 pages
About the Book:
Blue Ribbon Canning takes readers on a canning journey and celebrates two American traditions--preserved food and state fairs--with more than 140 prize-winning recipes for jams, preserves, pickles, vegetables, fruit, and more, plus tips and methods for making delicious--and safe--blue ribbon recipes at home.My Thoughts:
When one hears mention of canning and preserving, for many it seems to have a connection with older women or someone's grandmother and days gone by. I have been told that canning is going out of style. Why should one work so hard to produce things that could be purchased in the store for close to the same cost to possibly even cheaper than it can be made?!
Blue Ribbon Canning answers that question with the delicious recipes that are provided in this gorgeous book. These are award winning recipes from fair and competition winners and will be winners on anyone's table! Believe me, there is nothing that comes close to the taste of home canned food and preserves. Remember when you thought no one cooks like Grandma? It's true. You can't get these great tasting foods from the grocery store. It just doesn't happen.
Perfect for the newbie as well as the seasoned canner, this beautifully photographed book will delight the eyes while making the mouth water as one tries to find the perfect recipe to start with. There are so many to choose from ranging from the everyday Strawberry Jam to some of the more unusual recipes like Eggplant Caponata and Georgia Peach and Basil Preserves.
The book is well written with clear and concise instructions. It has canning safety information and USDA recommendations and seems to have food safety well covered. I love the stories of the blue ribbon winners that have been included throughout the book and especially love the serving suggestions that are included with the recipes. It's nice knowing how to use these more unusual recipes once you've put them up. At the end of the book are secrets for canning for competition for those that want to "show off" their talents.
This is a wonderful book that would be a well-used addition to any canning library. Make sure to add it to your must haves - you won't be sorry that you did!!
I received a copy of this book from NetGalley courtesy of the publisher. I was not required to write a positive review, but instead, one that gives my honest opinion.
Saturday, February 28, 2015
Rooting Roses
I have been successful rooting roses from bouquets in the past, but for some reason, I never thought of doing this with the $2 roses I bought until a couple of days ago. The roses themselves were past their prime, so I'm not sure if they will successfully root or not. I really have nothing to lose except for some soil, a little rooting hormone and time.
 I took the roses and cut off the bottoms of the stem at an angle just under a leaf bud. I made sure to remove the woody part and am using only the younger green part of the stem. The next step is to remove the flower down to a leaf bud and then to trim from 1/3 to 1/2 of the leaves that are left off.
Dip the bottom in root hormone then put this stem in potting soil. There are two ways to do that - first is to put just a small amount of soil in the bottom, put the stem in and fill in around it or you can put the soil in first, poke a hole with a chopstick or dowel and put the stem in being careful not to brush the hormone off when inserting the stem. Some people say not to use soil, but instead use soaked perlite, then fill the container with water. Others say to just use water to root the plant in. I didn't have perlite on hand, so I opted the soil method.
 Since roots aren't happy in light, I covered my container (the one from my amaryllis purchase after Christmas) at soil level with brown paper to keep the light out. I then inserted the whole container in a 1-1/2 gallon Ziploc bag, misted it some and then zipped it half way closed to allow for humidity retention but also allow for air circulation. I put them in the brightest window in the house and they will need to be kept warm - the way roses like it. In 6-8 weeks we will see if the roses survived and any sent out roots. I'm not sure how this is going to work with spent roses. I did crowd all 12 branches in the container, as I'm not expecting them all to live. Some say only expect half to root, and since my roses were spent, I'll be happy with just getting one! Keeping my fingers crossed.
Dip the bottom in root hormone then put this stem in potting soil. There are two ways to do that - first is to put just a small amount of soil in the bottom, put the stem in and fill in around it or you can put the soil in first, poke a hole with a chopstick or dowel and put the stem in being careful not to brush the hormone off when inserting the stem. Some people say not to use soil, but instead use soaked perlite, then fill the container with water. Others say to just use water to root the plant in. I didn't have perlite on hand, so I opted the soil method.
Thursday, February 26, 2015
Chicken Bone Broth, Bone "Meal" & Kitty Food
I've been collecting chicken bones from both legs and thighs - both after being cooked or when I debone the thighs before cooking. I have been putting them in a Ziploc in the freezer and finally got a full enough bag to make some bone broth.
 I put all the bones in a crockpot and then poured enough water over them to cover. I added an onion, a couple of sticks of celery plus leaves, a couple of carrots and a few spices: garlic powder, salt, pepper, a bay leaf and a little poultry seasoning. I also added a little vinegar to draw out some of the calcium out of the bones and cooked it on low for a good 12 hours.
The house smelled so good, but the best part was straining the broth and a sample taste to make sure it was seasoned correctly. OOOOHHH! Every time I make some of this, I can't help but to think back to my grandmother's chicken soup. She made the most yummy soup with celery, onions and carrots and poured it over her homemade Lane Kluski (Polish poured noodles). I never learned how to make it the way she did, but my broth is about as close as I'm probably ever going to get.
After straining and cooling the broth, I put it to chill and will remove the fat layer that forms on the top. My broth will be quite like jello and will need to be reheated to either can or make chicken soup with. I haven't decided what to do with it yet. Everyone here is now begging for soup since it smelled so good when it was cooking.
 The bones I used - especially the ones I deboned, still had some meat on, so I took all the meat scraps, a little of the carrots, celery and onion and put that in my mini food processor and ground it up, rolled it into serving sized balls and made some homemade kitty food. My cat goes NUTS over this stuff! They were flash frozen and then put in a Ziploc to store in the freezer for future use.
The bones were soft and easy to break, so they were broken up in small pieces to add to the compost - not exactly bone meal, but will easily break down since they are broken up into pieces. These will help increase the calcium and give other nutrients to the garden. The rest of the veggies that didn't go in the cat food also went into the compost. Nothing was wasted except for the skin and the fat from the raw chicken. I didn't use that but should probably look up how to use that as well so I don't waste anything from the chicken.
Chicken thighs run $0.99 a pound here. I bought a 3.81 pound package and after removing the skin, most of the fat and bone, I ended up with 2.25 pounds of chicken. I had about $1.25 of waste. By making the broth and kitty food plus the bone "meal", that waste which normally would have been thrown out, became something delicious and useful (except for the skin and fat, that is).

Homeacre Hop #109
The house smelled so good, but the best part was straining the broth and a sample taste to make sure it was seasoned correctly. OOOOHHH! Every time I make some of this, I can't help but to think back to my grandmother's chicken soup. She made the most yummy soup with celery, onions and carrots and poured it over her homemade Lane Kluski (Polish poured noodles). I never learned how to make it the way she did, but my broth is about as close as I'm probably ever going to get.
After straining and cooling the broth, I put it to chill and will remove the fat layer that forms on the top. My broth will be quite like jello and will need to be reheated to either can or make chicken soup with. I haven't decided what to do with it yet. Everyone here is now begging for soup since it smelled so good when it was cooking.
The bones were soft and easy to break, so they were broken up in small pieces to add to the compost - not exactly bone meal, but will easily break down since they are broken up into pieces. These will help increase the calcium and give other nutrients to the garden. The rest of the veggies that didn't go in the cat food also went into the compost. Nothing was wasted except for the skin and the fat from the raw chicken. I didn't use that but should probably look up how to use that as well so I don't waste anything from the chicken.
Chicken thighs run $0.99 a pound here. I bought a 3.81 pound package and after removing the skin, most of the fat and bone, I ended up with 2.25 pounds of chicken. I had about $1.25 of waste. By making the broth and kitty food plus the bone "meal", that waste which normally would have been thrown out, became something delicious and useful (except for the skin and fat, that is).
Sunday, February 22, 2015
Long Week & a Finish
It has been a very long week here. My husband was in a tremendous amount of back pain but didn't know what triggered it. He was unable to walk, sit or stand and could only lay in one position for some relief. After a trip to the Dr. and then a referral to a physical therapist that wouldn't treat him but sent him to the ER - we found out that he has a couple of herniated disks. That then took us to the orthopedic clinic where he found that his disk is pushing on a nerve. Right now, he is trying the least invasive treatment, but it doesn't seem to be working. Next up will be steroid shots and then disk surgery if that doesn't work. It amazes me that he went from being happy and normal to now using a walker and unable to stand for more than a minute or two.
 Not much has been done here at home - just the minute trivialities of homemaking. I did take a little time last night while my husband was sleeping to make a dishcloth. This photo was taken right after it came off the needles and is not washed or pressed. It was an easy pattern and can be found on the Knitting Knonsense website along with other letters and numbers.
I have another cloth on the needles that should be finished soon. There's something about knitting that seems to calm and soothe me. Guess it's cheap (and well needed) therapy :)
I have another cloth on the needles that should be finished soon. There's something about knitting that seems to calm and soothe me. Guess it's cheap (and well needed) therapy :)
Sunday, February 15, 2015
Frugal Valentine's

Valentine's gifts have always been so expensive, and when we were first married, hubby used to feel badly about not being able to afford a nice gift. I soon talked him out of seeing things that way by showing him just how wonderful it could be the day after. Everything is marked down at least 50% and really, what's one day? We started hitting the sales the day after and even stocked up on our chocolate for a few months. So many times you can find other things - not just the overpriced boxed hearts, but things like Hershey Kisses, Snickers, Reese's, etc. as well as baking items and even apparel. I've come home with some really nice sleep pants and t-shirts at a huge savings - just because they had hearts on them or were marketed for Valentine's Day!

Remember, being frugal does not mean you have to give up the finer things in life - it just means you know when to purchase them.
Saturday, February 14, 2015
A Good Day for Onion Soup


With all that snow and wind going on outside, it seemed like a great day for some French Onion Soup. Nothing warms the soul like a good hot bowl of soup - and it feels like the soul needs a lot of warming today!

Onion Soup is both quick and simple to make. You slice up some onions and sweat them in butter. This makes them soft and sweet - no matter how "hot" they were when you started.

Then you add some broth, Worcestershire sauce and salt and pepper if you desire. Top it with toasted French bread or croutons and Provolone cheese and it's ready to eat!
French Onion Soup
6 to 7 cups thinly sliced onions
1/4 cup butter
32 ounces beef broth (I used Emeril's Organic)
1 tsp. Worcestershire sauce
Salt & pepper (optional)
French bread or Croutons
Provolone Cheese
Sweat the onions in butter over medium heat for about 20 minutes or until the onions are soft. Add the broth, Worcestershire sauce, and salt and pepper to taste. Heat to boiling. Serve in bowls with toasted bread or croutons floated on the soup. Put a slice of Provolone cheese on top of bread. If desired, you can heat under a broiler to melt the cheese, but if you do so, make sure you use broiler safe bowls.

Thursday, February 12, 2015
Is Canning Worth It?

Let's compare my last canning day. I made 5 pints of Chicken Corn Chowder and 2 pints of canned chicken thigh chunks. First lets look at the cost of ingredients.
chicken thighs - $4.12.
onion - 18 cents
celery - 8 cents
potatoes - 20 cents
corn - 99 cents
chicken broth - 1.99
canning jar lids - 81 cents
for a total of $8.37
If I purchase Campbell's Chunky Soup, they currently run $1.98 a can - 5 cans = $9.90. To be fair, the Chunky are in 18.6 oz cans, so we should be figuring by the ounce. 10.7 cents x 16 ounces = $1.712. That would cost $8.56 for comparison.
I then went looking for canned chicken. If I purchase Swanson Premium Light and Dark Chicken in water, I will pay $1.98 for a 9.75 ounce can. That breaks down to 20.3 cents an ounce. Unfortunately, I cannot find any dark meat only, so this is as close as I can get for comparison. 16 ounces = $3.248. 2 pints = $6.48
With that said, if I purchased the equivalent of what I canned from the store, I would have spent $15.04. My cost was $8.37 for a savings of $6.67. If I had used my own produce out of the garden as well as my own canned broth, I would have been able to save even more.
This isn't the end of the savings though, because the bones I had left from the chicken were frozen to be used at a later date. When I get enough, I will make a nice batch of broth to can.
So, is it worth it? In my opinion, yes. I saved money and the flavor is much better. Plus, I know exactly what went into those jars!
Monday, February 9, 2015
Canning Chicken & Chicken Corn Chowder
There was a sale on Campbell's Chunky Soups a bit ago, so I decided to stock up. My daughter takes lunch most days and thought these would be good for her to take while it was cold out. I was sooooo wrong. I haven't had these in a long time, so maybe I'm remembering them being better then, but they were AWFUL! I have a bunch in the pantry that I will eat because I purchased them but never again.
Which leaves me no choice but to put up my own soups and stews.
I haven't canned much in the way of soup - just vegetable soup, so today was my first try with chicken. I got some thighs on sale and figured they would be perfect for canning. I found a recipe for canning Chicken Corn Chowder on SBCanning.com that looked good, so I gave it a try.
 I removed the skin, fat and bone from each thigh - freezing the bones to use later to make broth. I only did 10 thighs and put aside the other 6 for dinner. The 10 thighs made enough for 2 pints of chicken and 5 pints of Chicken Corn Chowder. I was surprised I ended up with so much out of ten!
The biggest time suck was the preparation, but when it came time to put everything together, it went quite quickly. Everything sealed and now I'm anxious to try a jar to see how they turned out.
Which leaves me no choice but to put up my own soups and stews.
I haven't canned much in the way of soup - just vegetable soup, so today was my first try with chicken. I got some thighs on sale and figured they would be perfect for canning. I found a recipe for canning Chicken Corn Chowder on SBCanning.com that looked good, so I gave it a try.
The biggest time suck was the preparation, but when it came time to put everything together, it went quite quickly. Everything sealed and now I'm anxious to try a jar to see how they turned out.
Saturday, February 7, 2015
It's Bean Time!
I had purchased a lot of dried Roman Beans for 50 cents a pound at one of those outlet stores a couple of months ago. I had no idea what they were, but they were dried, cheap and looked a lot like pinto beans, so they came home with me. I did some research on the net and found that these beans can be used interchangeably with kidney beans, black beans. chili beans and pinto beans. Sounds like I found a goodie!
I decided that it would be a good time to try them, so I soaked 2 pounds to can for soups, etc. and while I was at it, I thought I'd do a pound of baby limas as well. I sat down with the Ball Blue Book and found that for every quart of beans I want, I need 3/4 pound of dried beans. Hmmmm - not enough for a canner load, so I decided to try SB Summer BBQ Beans from SB Canning to make a full load.
I used Garden Gnome's recipe for Home Canned Kidney Beans & Lima Beans as she does her beans just a little different than I normally do. If you haven't been to her website called Mom's Cafe Home Cooking, you really must! She has so many great recipes posted there with a lot of guidance for both the newbie and the experienced cook alike. I love her site!

Well, it appears Ball was quite a bit off the mark on how much I needed. I ended up with 4 pints of Baby Limas, 6 pints of regular Roman Beans and 6 pints of SB Summer BBQ Beans with quite a bit left over!! My All American Pressure Canner only holds 16 pints so I decided to use the leftover in chili for dinner tonight.


I decided that it would be a good time to try them, so I soaked 2 pounds to can for soups, etc. and while I was at it, I thought I'd do a pound of baby limas as well. I sat down with the Ball Blue Book and found that for every quart of beans I want, I need 3/4 pound of dried beans. Hmmmm - not enough for a canner load, so I decided to try SB Summer BBQ Beans from SB Canning to make a full load.
I used Garden Gnome's recipe for Home Canned Kidney Beans & Lima Beans as she does her beans just a little different than I normally do. If you haven't been to her website called Mom's Cafe Home Cooking, you really must! She has so many great recipes posted there with a lot of guidance for both the newbie and the experienced cook alike. I love her site!
The beans cooked up nicely. They were meaty and larger than normal beans and made a delicious chili!
Dinner - a nice bowl of chili on a bed of salad topped with cheddar cheese, sour cream and taco sauce. Oh man! I'm glad there were leftover beans!!!
Friday, February 6, 2015
Becky's Soap Cut - hmmmmm
Today was the unveiling of Becky's soap and it didn't turn out like I expected. My guess is either the scent or the coloring or both didn't agree with the olive oil. I used Bertoli brand olive oil and also some homemade calendula oil out of the same brand.

As you can see, the tops turned brown and didn't look great.

I discovered little beads of oil or sweat on the top of the soap of the larger piece.

Those that came out of the cookie molds had spots on the bottom and the tops were brown.

Cutting was interesting - the soaps cuts some and also broke. Possibly these needed to set longer? Maybe it was also the issues that turned the soap brown. It's sad, because these these were an interesting pink yesterday.
I also have decided that the smell of the Strawberry Jam wasn't for me when I took these out of the mold. However, when I was rinsing off the cleaver, I found that the smell was really quite nice. Does this mean there is still hope? Maybe as these cure they will harden and turn out to still be decent soaps. I've read that it will take longer to cure and a good olive oil soap bar will be best at about 9 months or longer.
I'm having a lot of fun trying the soaps out - the successes and failures really make me want to try for something better or change something to make the recipe work. Lots of crumbled pieces from this soap. I've decided to collect the crumbs and will put them all in a soap down the road. Might make for an interesting bar.
Thursday, February 5, 2015
Dreaming of Spring

I've been spending quite a bit of time online looking for projects to do this year. I found some great canning ideas and even had one of those DUH moments. I was reading how one person makes her chicken broth (I can't find that blog now - must go back through history!) Anyhow, she cooks her chicken legs, etc. and the family eats their fill. She takes those bones you'd normally throw away and freezes them until she has enough for a batch of broth. She then takes the bones, covers them with water and puts in some carrots, celery, onion, and cooks them until she has a nice broth. Then she strains it, cools it, takes off the fat layer, then cans it. She also says that you can grind the bones up for bone meal - many homesteaders do that. Talk about not wasting a thing!
I made some more soap this afternoon. I followed Becky's (from Becky's Homestead) Easy Homemade Soap recipe and made a half batch of olive oil soap. I added some Strawberry Jam fragrance oil and tried Gel Tones Neon Pink to color it. I'm not crazy over the smell right now, but we'll see what happens after it cures.
I loved Becky's flower soaps, so I went to Amazon and purchased a mold for myself for under $4 shipped. It's coming from China, so it won't be here for a couple of weeks.
Not much else going on at the Cottage. Just snow and snow and snow. We do have a little sunshine this after noon, but it's supposed to snow again this weekend. Tomorrow I cut the soap, so will post the results then.
Friday, January 30, 2015
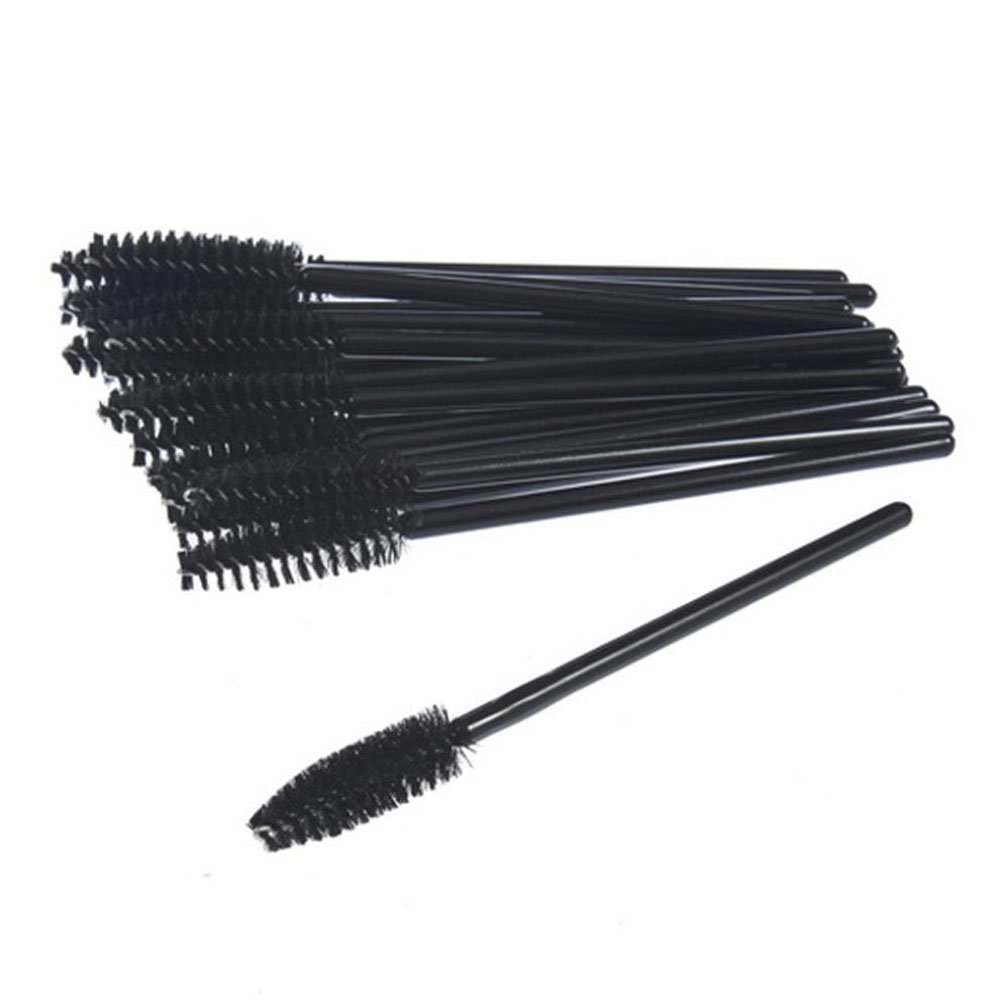
Hummingbird Feeder Brushes
Every year I put out at least 2 hummingbird feeders starting at the end of April. I love seeing those gorgeous flitting jewels of the air as they stop by and take a sip. They always brighten my day. One of the problems that I've been having is finding a small enough brush to clean the feeding holes. I have been using pipe cleaners but they don't always have enough of a bristle or strength to clean well.
 While browsing Amazon, I found some cleaners designed just for the feeders called Droll Yankees PLB Perfect Little Brush (see link here). I was amazed at how much the brushes cost and was looking at them thinking I've seen something like that before. For the life of me, I really couldn't remember. I just knew it looked familiar - VERY familiar.
 While I was looking at them, my husband came by and I stopped him and asked him if he thought they looked familiar. He gave me the dumbest look and said, "Don't you recognize mascara brushes when you see them?" Yah - one of those face-palm moments. That's exactly what they look like! So I went looking for Mascara brushes and found packs of disposable ones for TONS less than the Droll Yankees brushes. I took a chance and purchased the Leegoal Sheenroad 100 pcs Disposable Eyelash Mascara Applicator Wand Brush (see link here) for under $4 shipped! They were shipped from China so I didn't expect to see them for quite a while, but it took less than 2 weeks to arrive. These things work perfectly!! They fit in the holes and clean better than anything I've tried before!!
If you compare pictures side by side, you might notice there is a bit more loft on the mascara brush. I like that. These also can be bent at the end so you can reach in places you might not have been able to with a straight brush.
I'm happy with my purchase. I got 100 for about 2/3rd's the cost of 3!!!
Thursday, January 29, 2015
Crisco Soap Cut

I know my photo looks sad and doesn't do anything for the soap (soap is a light tan on tan paper in a cardboard shoe box - talk about monotone!). Heck, as far as that goes the soap cuts look sad. I used a mushroom container for the mold and it wasn't smooth on the bottom. I am just going to have to invest into a decent mold now that I am going to continue. I'm not comfortable handling the lye yet - and it needs to stay that way to keep from having accidental burns. The one that scares me the most though, is the splash in the eyes. I've seen photos of that and it's scary!
My next adventure... Pink soap with a strawberry scent.
Tuesday, January 27, 2015
Soap Progress

I know my cuts are sad to look at, but I thought I'd try different thicknesses to see what we'd like, plus they really need some help with being even. LOL
Then it was on to try a new recipe. I saw a soap made from Crisco on Brother's Handmade website where it used just Crisco, lye and water and a fragrance if you'd like to add one. Sounded easy enough, so I gathered everything and whipped up a batch. This one came together so quickly. Between the immersion blender and the fragrance, I went from a good trace to "mashed potatoes"!! It is now sitting wrapped in towels and curing. I can't wait to see how this one turns out. I used a fragrance called Lemon Bundt Cake and it smells divine!
Sunday, January 25, 2015
Soap Making Class
So, I finally did it! I made my own soap. Was it a success? Only time will tell.
We had a nice small class, so there was lots of student/teacher interaction. That was nice. I measured out the lye, water and the fats: vegetable oil, lard, and tallow. We melted the fats, mixed the lye and water and when they were both at 100 degrees, they were mixed together.


 ... but after another 45 minutes of stirring, still no trace, so the instructor said it probably wasn't going to. She suggested quitting and just put it in the mold and see what happens.
She was with us through all the steps and helped us with measuring, etc, so she knew that everyone's should be right. But not all traced. Strange, eh?
She's not sure if it will set up or not, so we shall see after 24-48 hours. If not, I can remelt and try again.
Keeping my fingers crossed.
I must say it was a fascinating process and I will certainly try again. Next time, though, I use an immersion blender!!
We had a nice small class, so there was lots of student/teacher interaction. That was nice. I measured out the lye, water and the fats: vegetable oil, lard, and tallow. We melted the fats, mixed the lye and water and when they were both at 100 degrees, they were mixed together.
Then came the stirring....
and stirring....
and stirring....
and about two hours later I had soap coating the sides.
This meant that a trace should be soon to follow....
She was with us through all the steps and helped us with measuring, etc, so she knew that everyone's should be right. But not all traced. Strange, eh?
She's not sure if it will set up or not, so we shall see after 24-48 hours. If not, I can remelt and try again.
Keeping my fingers crossed.
I must say it was a fascinating process and I will certainly try again. Next time, though, I use an immersion blender!!
Saturday, January 24, 2015
Making the Bucket List Smaller

I was going through emails and found a local class teaching soap making tomorrow. I called and found it still had an opening, so I've signed up! Tomorrow I will be able to cross off another item off my Bucket List! YAY!!!
Thursday, January 22, 2015
A Great Laundry Stain Remover

Stain Remover:
2 Parts Hydrogen Peroxide (H2O2)
1 Part Original Dawn (blue)
Mix together in a spray bottle. Spray on stain - best if allowed to set for a day or two before washing. I spray it on and fold up the stained item to keep it moist. Wash as usual.
I found the recipe on Po' Papa Joe's blog along with a great homemade laundry detergent that works really well. I tried the detergent but think I grated my Fels Naptha bar a little too coarsely. Right now, I have to use boiling water to get it to dissolve. I think finer would be much better. It still works well - just a bit more fussing to use it now.
Small Batch Laundry Detergent
1 bar Fels Naptha
1-1/3 cups washing soda
1-1/3 cups borax
Finely grate the Fels Naptha and mix with the other two ingredients in a plastic container (I used a 3 pound cottage cheese container). Use 1-2 Tablespoons per laundry load. I found that this works best for me if I dissolve the mix first in hot water, then add to my machine. I have a front loading machine and just put it in the drum then add the clothes.
Wednesday, January 21, 2015
More Snow in the Forecast for Today

The new frames at left center.
Snow... I love the stuff fresh, but when it starts melting and it starts looking dirty, I'm no longer so fond of it. Nothing can match the beauty of a new snowfall - especially when it's heavy and sticks to everything. As much as I love snow, I'm getting more and more sensitive to the cold and sometimes wish we had moved further south. Funny I should say that, as we were looking at property in Maine. Ah, but we were younger then.
The forecast calls for 3-5 inches today. I'm betting that's going to end up covering my new frames (see photo). Our yard is not as large as the photo. It ends at the last maple tree on the right. I wish I could plant all the way to the line, but the water line comes down through the yard and if anything were to ever happen to it, whatever was planted on top would be dug up. I have to find out from the water co. how close I can get to it without fear of things being disturbed.
Town life is frustrating in certain aspects, but in other ways, it's really nice. We are on the outskirts of town, so our neighbors aren't very close and across the road are farms, giving us a feeling of living in the country. We are close to the hospital, doctors, dentists, etc., as well as many activities. I've never been able to attend a gardening group until now. They have been too far away from us before.
I'm now involved with the community: I'm on the Election Board, a member of a women's group, a jewelry making group, 3 gardening clubs in which I'm now a leader of a one of them (hubby says I'm nuts! LOL) There's also a local Grange I've been thinking about joining, but I need to see how much time the groups will be taking before I take on any more. And then there's the Master Gardener's program that will be offered here soon. That's a must in my book!
If you would have told me ten years ago that this would have been where I'd end up, I wouldn't have believed you for a second. It wasn't what we wanted. Looking back at everything, I know that God knows better about what we need and when we need it. All the places we put offers on that were rejected, all the areas we looked at that we thought would be great, all the money we scrimped and saved for years thinking we'd be able to buy a farm... Instead it all ended up for us to move here. We even had the exact amount for the down payment and closing costs. I came come to believe there are no coincidences. Now I need to make the most of the gift we were given!
Tuesday, January 20, 2015
January is Seed Order Time

We've been here two years now and my fingers are really itching to garden again. We left behind a 36' x 80' garden and now we are starting over. I do miss the large garden and I miss the soil even more. The first year here, there were 6 4' x 8' frames in the back yard. I didn't plant much in them, only the things I brought from the old house: strawberries, Egyptian walking onions, chives, garlic chives, mint and rhubarb. I wasn't sure how they would do here, but had to move them before we put the old house up for sale. I also brought some heirloom flowers that came from my mother's and grandmother's gardens. Mom and Grandma are long gone, but the flowers continue.
Things did pretty well, but I didn't plant anything else as I watched to see how the light would be on the frames. Some of them don't get sunlight until noon! I was going to pull those out, but am wondering if they will do well to keep lettuce and cool loving veggies in them.
Hubby made two new frames for me last fall. He decided to orient them differently. The frames that were here ran north to south - the new ones run east to west. We filled them with leaves and dirt to lighten up the soil. I'm hoping this will help!
Last year I tried some veggies, but some really don't like the heavy clay soil. I need to amend it a LOT to make it lighter. I took one frame in the fall of 2013 and put a whole garbage can of compost in it - then planted my garlic in it. I grew the best garlic I've ever grown last year! I did the same thing this past fall, but am hoping the added leaves won't be a problem (we used one of the new frames). We ended up planting 108 cloves of garlic. That should give me enough to replant, use for the year and maybe even share. Can't wait to see how they turn out.
So - back to the seeds...
I found a new place that I wanted to try called MIgardener . The site is run by a young man and his fiance. He is a gardener who want to inspire others by posting TONS of information and videos. All his seeds have been tested and grown by him before he offers them. He also only charges 99 cents a pack and the packages have generous amounts of seeds in them. My package was just shipped out, so I will be anxiously awaiting their arrival. Turn around from the time of order to shipping was FAST! MIgardener offers vegetable, edible flower and herb seeds.
I also purchased some seeds from Le Jardin du Gourmet . I have purchased from them years ago and was pleased to see they are still in business. They offer regular sized packets as well sample packets that contain enough seed for the small gardener or one that wants to try something new without spending a lot of money. Each sample packet runs 40 cents. They offer vegetables, flowers and herbs.
Now, off to research more about some of the unknowns I purchased...
Friday, January 16, 2015
Saturday, January 3, 2015
Great Day to Sort and Toss

Since it's miserable outside, it was the perfect day to stay in, stay warm and work on those miserable tasks I've put off - like sorting and tossing. When we moved down here, we had to downsize but we found out that we didn't downsize near enough, so the basement has been sitting unused except for storage. Today was a day to start working on that mess.
I did surprise myself and those boxes I went through, I either put in a recycle, donate or toss pile. I did over 12 boxes and kept enough things to fill one. Now, if I can keep up the momentum, we will have a useful basement by spring. It's amazing how easy it is to put things away - especially when they're boxed - and ignore them.
I'm looking forward to getting things cleaned out so I can start on a crafting/sewing area and a recreation area in the basement. Having that kind of a space down there would make life much easier. I just have to keep telling myself that now...
Thursday, January 1, 2015
Happy New Year!

I want to wish everyone a Happy New Year. We can again begin with a brand new slate and a fresh outlook with new goals. There are no failures, just setbacks that can be learned from or changed. I love sitting down at the beginning of each year and plan. Those plans will be many and I may or may not attempt or succeed at doing them all, but this list of plans always signifies hope and dreams for me.
Yesterday, we went to town to get a pork shoulder for the traditional New Year's Pork and Sauerkraut and of course I have to browse the after Christmas markdowns. We always replenish our wrapping paper and boxes for the next year and look for things that can be used throughout the year as well.

I had to take it home and disassemble it. What I found was a bulb that had the basal plate chopped off, roots trying to grow but most were rotted off. I washed it off and cleaned it as best as I could.
I really wish I had taken photos of the condition it was in when I took it out of the container, but my main concern was getting this poor thing planted in a new pot in soil and hope that it would recover from all its abuse.

It is now in a sunny window and possibly in soil for the first time in its life. I wonder what it's "thinking" now...

Now we just have to convince it to survive...
Subscribe to:
Posts (Atom)